Work & Study · Free printable
Free Plot Diagram Graphic Organizer
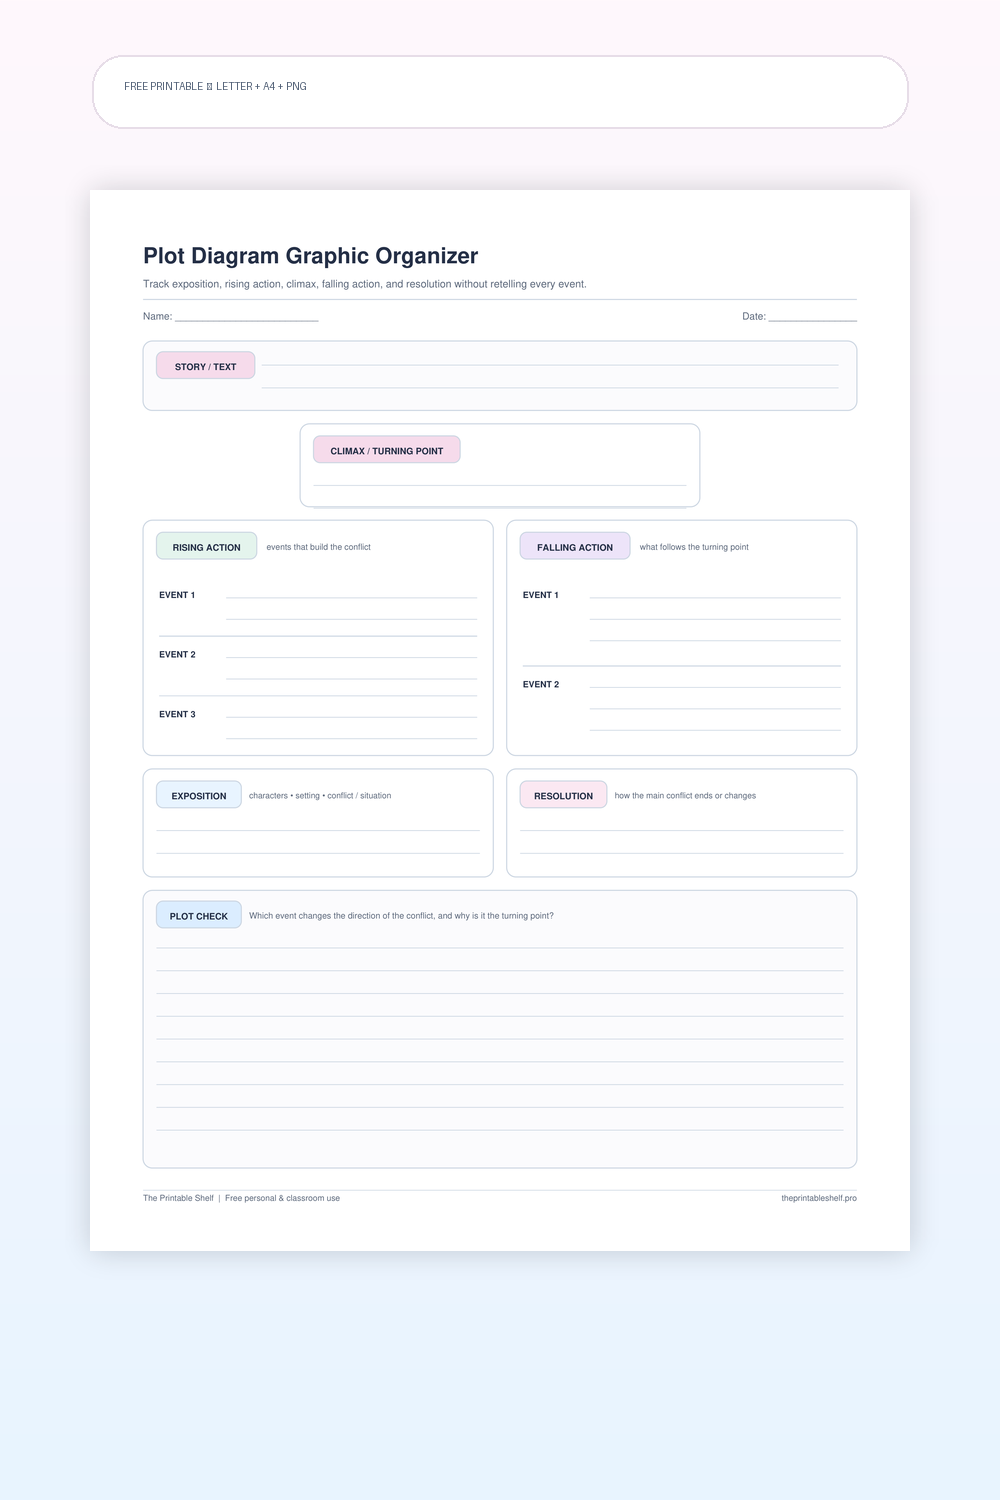
This free plot diagram graphic organizer helps readers or writers identify exposition, rising action, the climax or turning point, falling action, and resolution without retelling every event. The page includes space to name the story, select the events that build the conflict, and explain why one event changes the direction of the plot.
Edited by Tessa Vaughn · Planning & Organization Editor
Free download
Choose your file size
Print at 100% / Actual Size for the cleanest margins. Pick the paper size your printer normally uses.
Share to Google Classroom ↗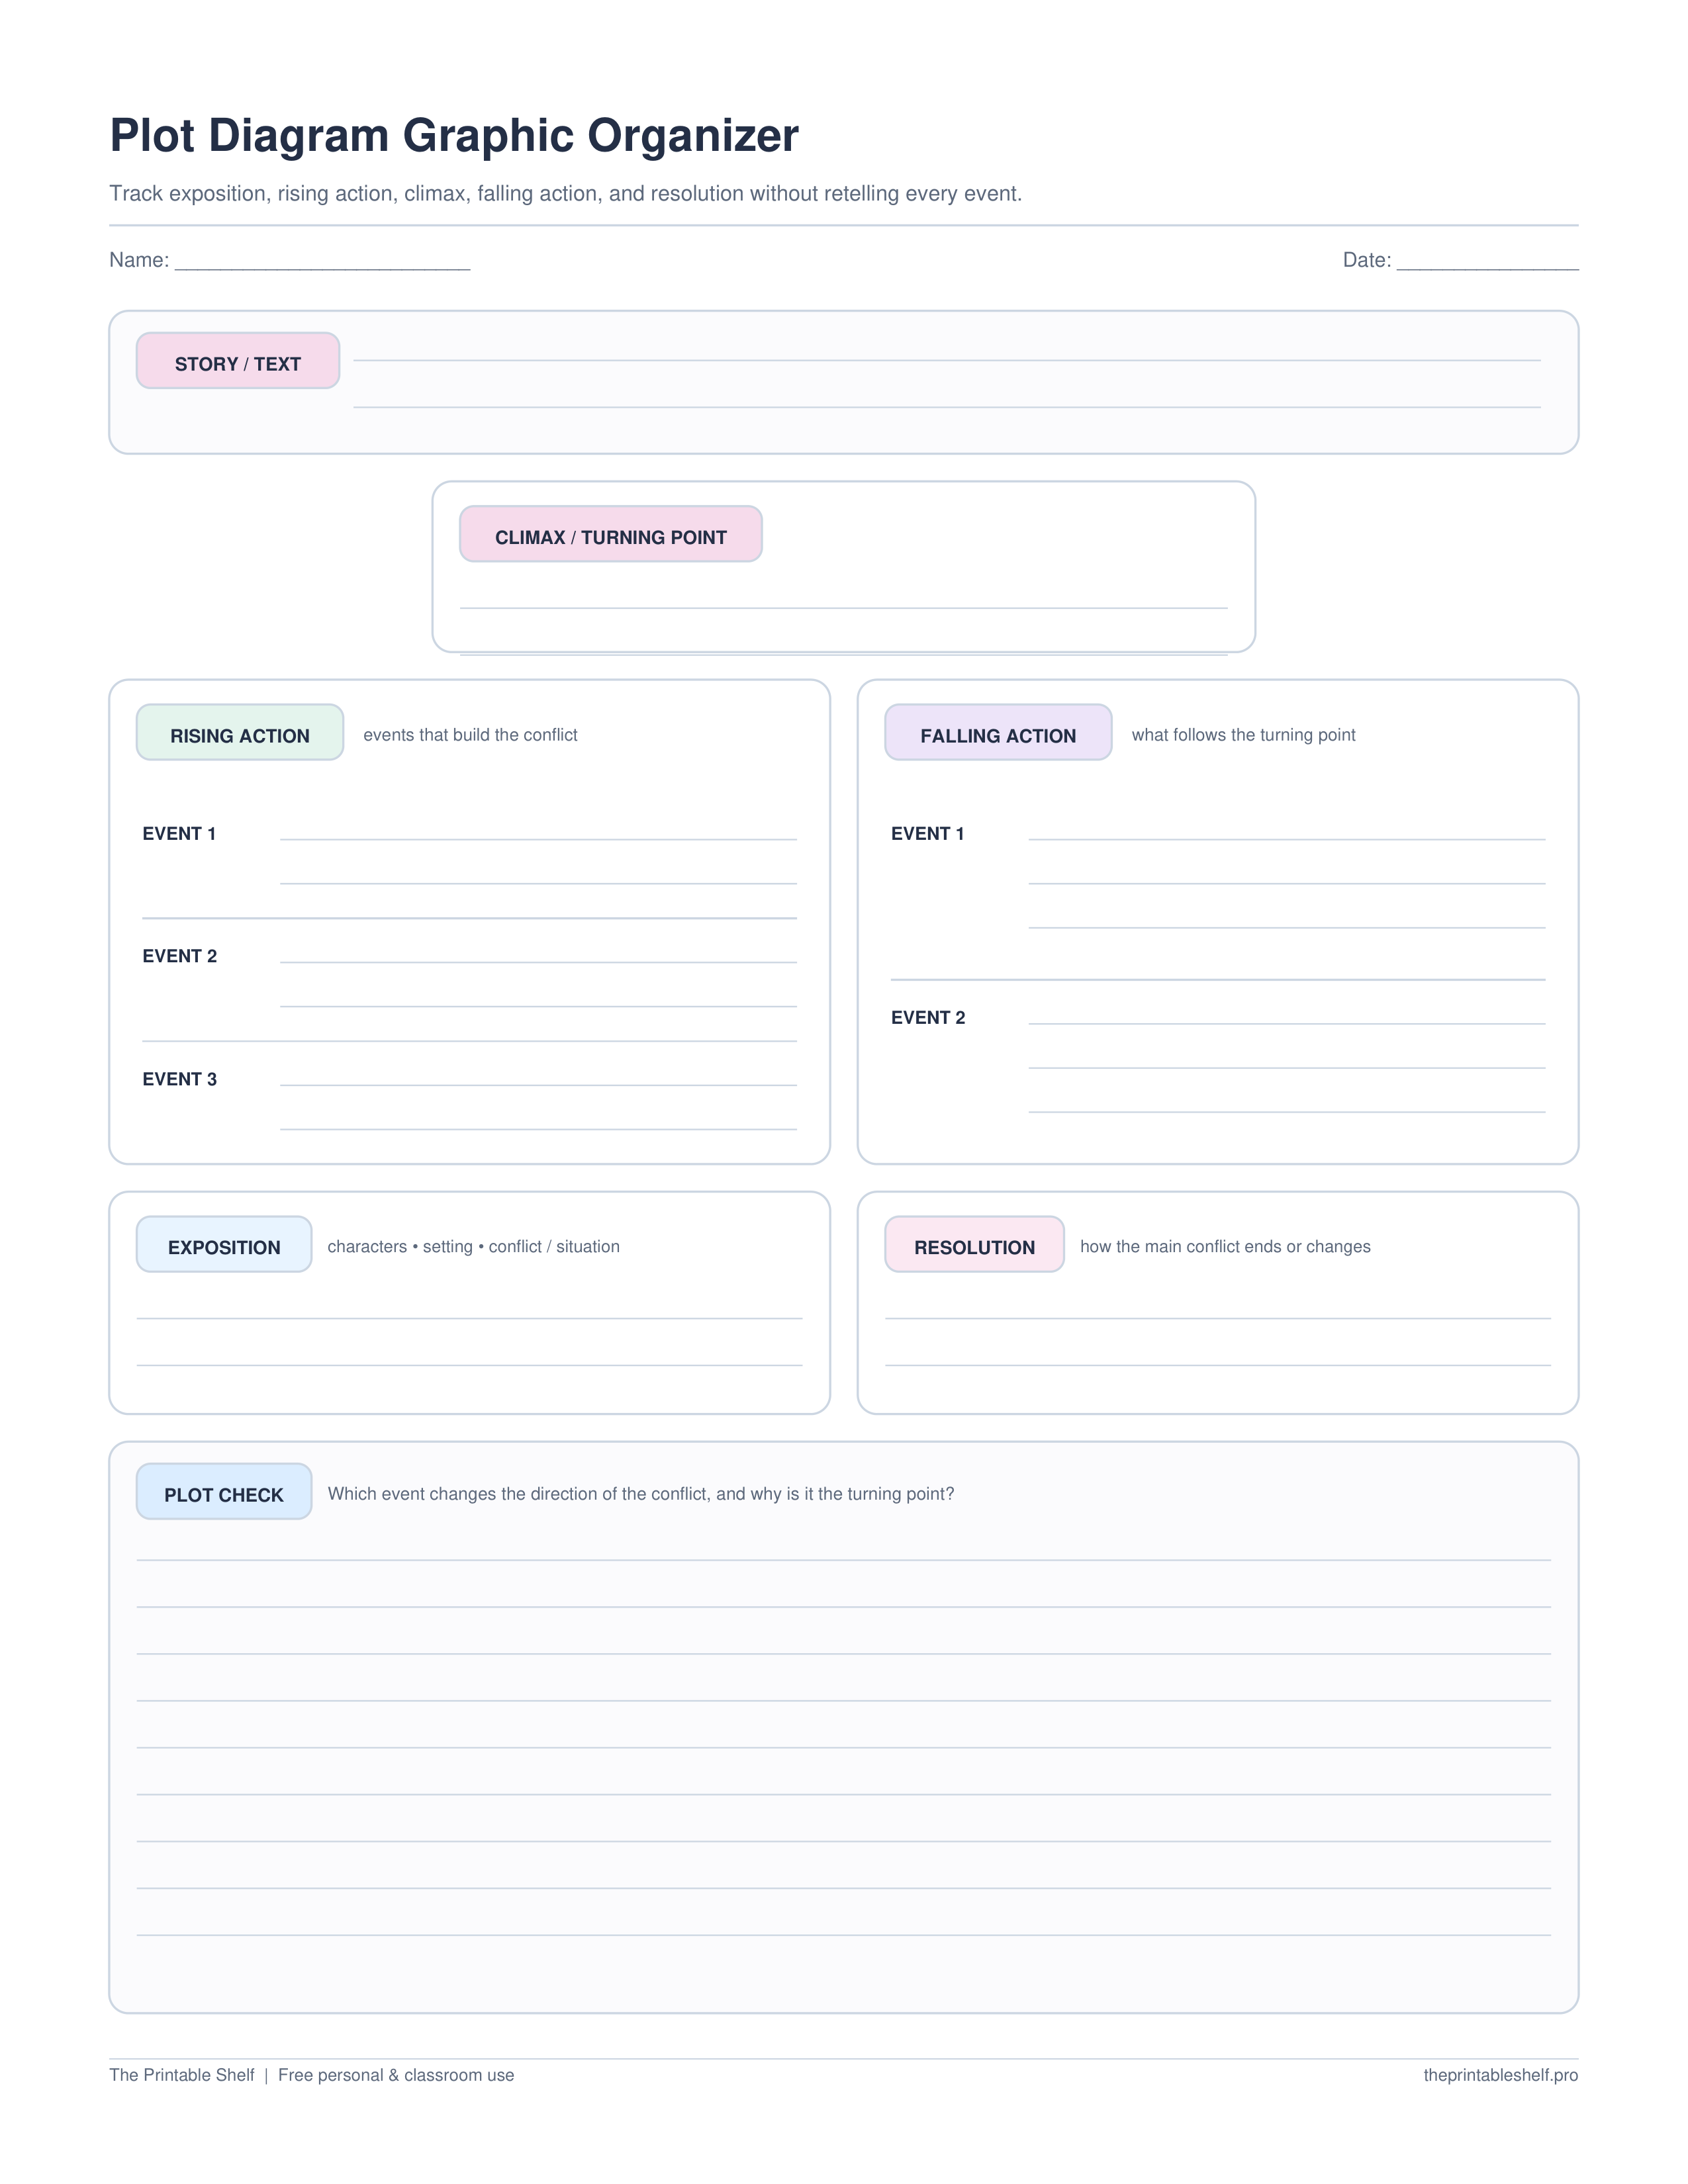
No sign-up required · personal/classroom use
What is on the page
A plot-structure organizer for examining how a story develops around conflict and a meaningful turning point. It is more specific than a general story map: instead of collecting characters, setting, problem, and solution as separate story elements, this page asks the learner to sort significant events into exposition, rising action, climax, falling action, and resolution. The final plot-check prompt keeps the diagram focused on why the turning point matters rather than on the visual shape of a mountain.
Using it in class or at home
Read the whole story, scene, or short narrative before deciding where every plot stage belongs. Use the exposition area for the setup the reader needs—such as characters, setting, and the initial situation—then identify the conflict where it actually emerges and keep only later events that materially increase, complicate, or redirect it. A plot diagram is not a chapter-by-chapter timeline. Selecting the significant events that change the story usually makes the structure clearer than copying every event.
Use the climax or turning-point box before filling every other section if the story has a clear decisive moment. Ask what event changes the direction of the conflict, forces an important decision, reveals something that cannot be undone, or makes the eventual outcome possible. The climax is not automatically the loudest, most dramatic, or most exciting scene. Require a short explanation of why the chosen event functions as the turning point so the label is supported by the text.
Place earlier events in rising action only when they build pressure, add complications, or move the conflict toward the turning point. After the climax, use falling action for the immediate consequences and changes that follow from that turn. The resolution should show how the main conflict ends, changes, or remains intentionally unresolved. Some stories compress or rearrange these stages, so the organizer should support an interpretation rather than force every narrative into identical proportions.
For a small-group lesson, model the organizer with a short familiar story and compare two possible climax choices. Ask each group to point to details that make one choice more defensible. When groups disagree, the useful question is not who filled the worksheet the same way as the teacher; it is whether the sequence and turning-point claim can be justified from the text. This turns the diagram into a discussion tool instead of a labeling exercise.
Writers can also use the page before drafting. Sketch the exposition, select the complications that meaningfully build the conflict, decide what must change at the turning point, and then plan consequences and resolution. Treat the diagram as a flexible planning scaffold: if the draft develops a stronger conflict or ending, revise the organizer rather than protecting an early plan. The goal is a coherent cause-and-consequence arc, not a perfectly symmetrical mountain shape.
Customize instead
Need a different title, paper size, or orientation? →
Use the free Graphic Organizer Maker to build a custom Venn, KWL, Frayer, story map, T-chart, main-idea, sequence, or cause-and-effect page.
Also in a free pack
Download this organizer together with related pages when you want one reusable master PDF instead of separate files.
Best uses for this template
Ideas for using this page
Locate the turning point
Compare candidate climax events and explain which one most clearly changes the direction of the conflict or makes the resolution possible.
Separate plot stages
Sort only significant events into rising action and falling action so a retell does not blur the structural role of each event.
Plan a narrative
Outline complications, a consequential turn, and what follows before drafting, then revise the plan if the story develops differently.
Mistakes to watch for
Calling the most exciting scene the climax automatically
Ask which event actually changes the direction of the conflict and justify that choice with story evidence.
Listing every event in rising action
Keep only events that build, complicate, or redirect the central conflict.
Treating falling action and resolution as the same thing
Use falling action for consequences after the turning point and resolution for how the central conflict finally ends or changes.
Classroom fit
Where it fits: grades and standards
Suggested grade bands
These are practical use ranges, not hard limits. Text complexity and the amount of teacher modeling matter more than the worksheet alone.
Good fit for
Scaffold level: Standard.
Common Core crosswalk
No narrow standards code is listed for this general-purpose template. Use it where the thinking task fits your local curriculum.
Quick answers
What are the five parts on this plot diagram?
The page uses exposition, rising action, climax or turning point, falling action, and resolution. These labels help organize significant events around the development and outcome of a conflict.
Is the climax always the most exciting part of a story?
No. A stronger test is whether the event changes the direction of the conflict or makes the outcome possible. The most visually dramatic scene and the structural turning point are not always the same.
How is a plot diagram different from a story map?
A story map usually collects story elements such as characters, setting, problem, events, and resolution. A plot diagram focuses more narrowly on how significant events build toward and follow a turning point.
Guides that go with this page
See where this organizer fits, when a different layout works better, and how to turn the completed page into a useful next step.
Free Reading Comprehension Graphic Organizers by Reading Skill
Free reading comprehension graphic organizers for story elements, main idea, sequence, cause and effect, comparison, vocabulary, and prior knowledge.
Read guide →
How to Use Graphic Organizers Effectively (Without Turning Them Into Busywork)
Learn how to choose, model, scaffold, and reuse graphic organizers so students think with them instead of simply filling in boxes.
Read guide →
How to Use a Story Map for Better Reading Comprehension
Learn how to use a story map for characters, setting, problem, key events, and resolution, with a worked example and common fixes.
Read guide →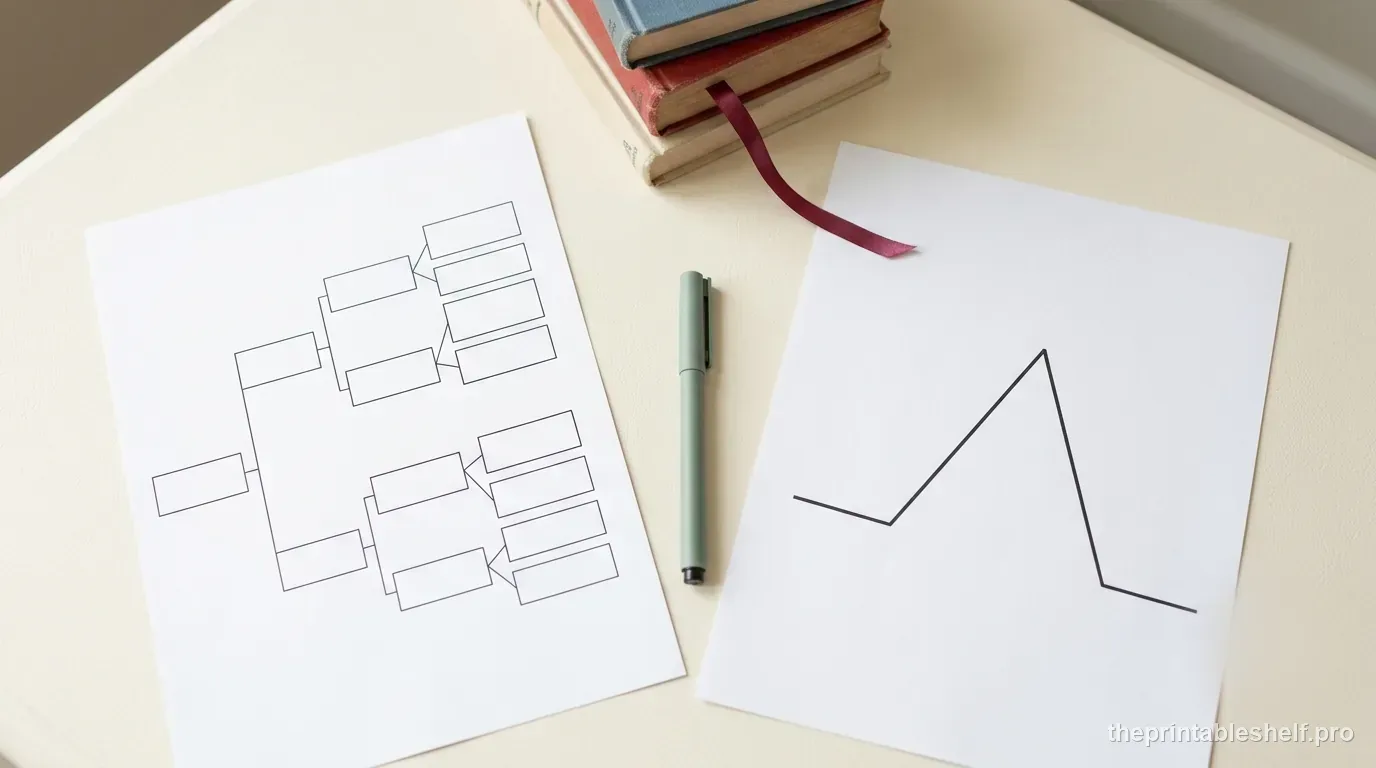
Story Map vs. Plot Diagram: Which Graphic Organizer Do You Need?
Compare story maps and plot diagrams, see what each organizer captures, and choose the right one for comprehension, retelling, or plot analysis.
Read guide →Keep organizing
You might also like
Free printable
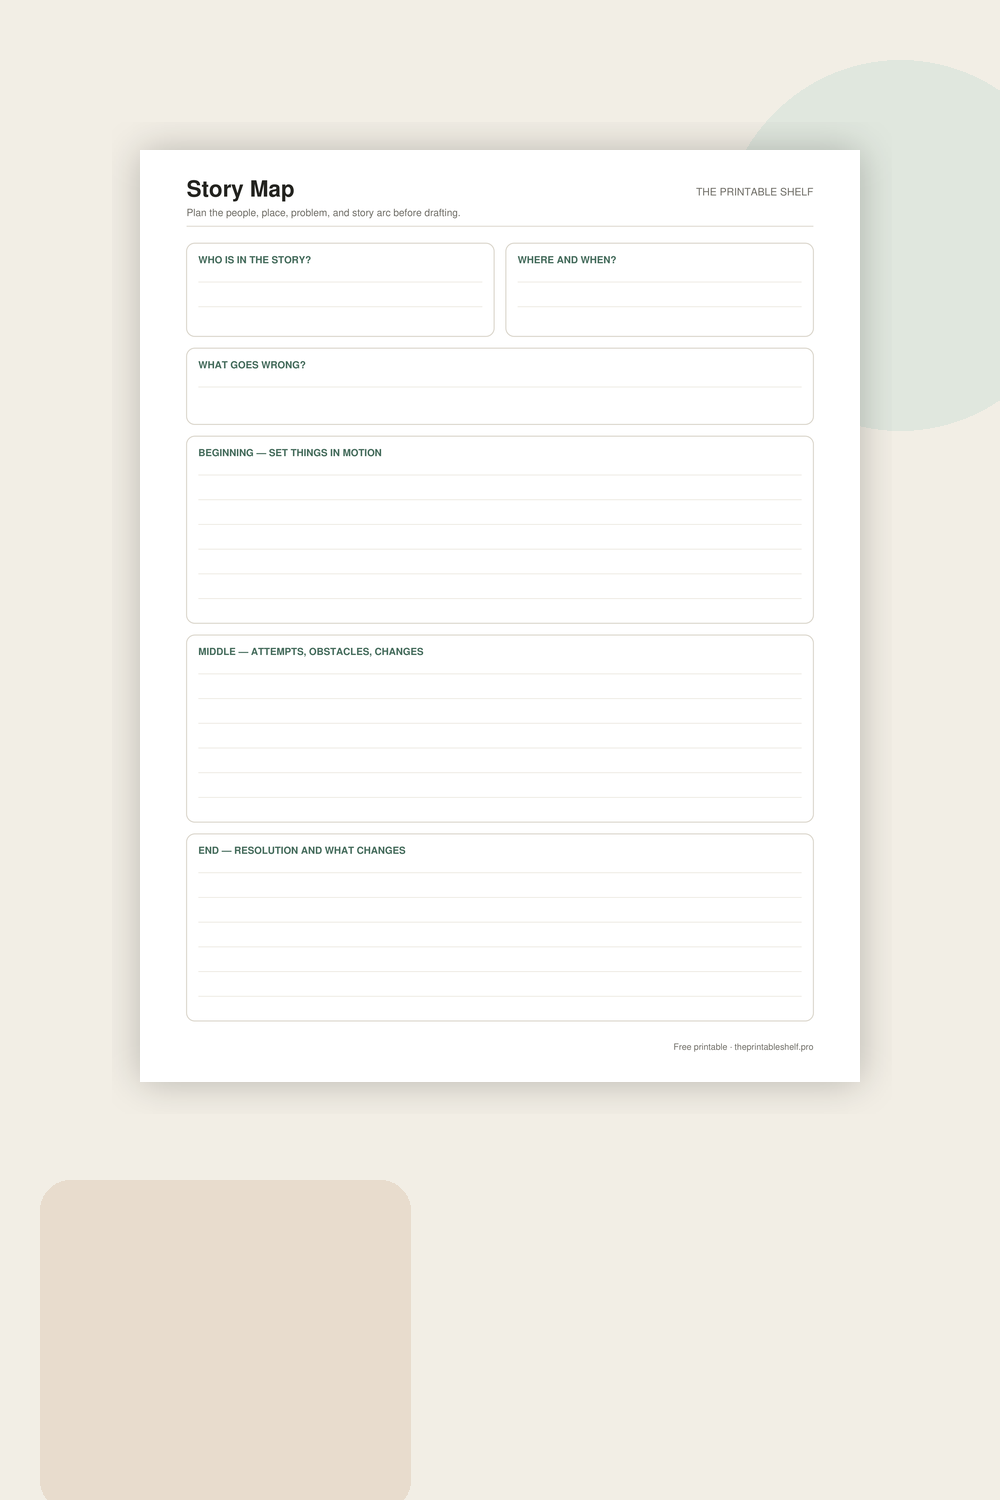
Printable Story Map Template
A one-page story organizer that separates the pieces students often mix together. Characters and setting establish who and where, the problem gives the story something to resolve, and three larger boxes organize the sequence into beginning, middle, and end. It works for reading response or prewriting.
Free printable
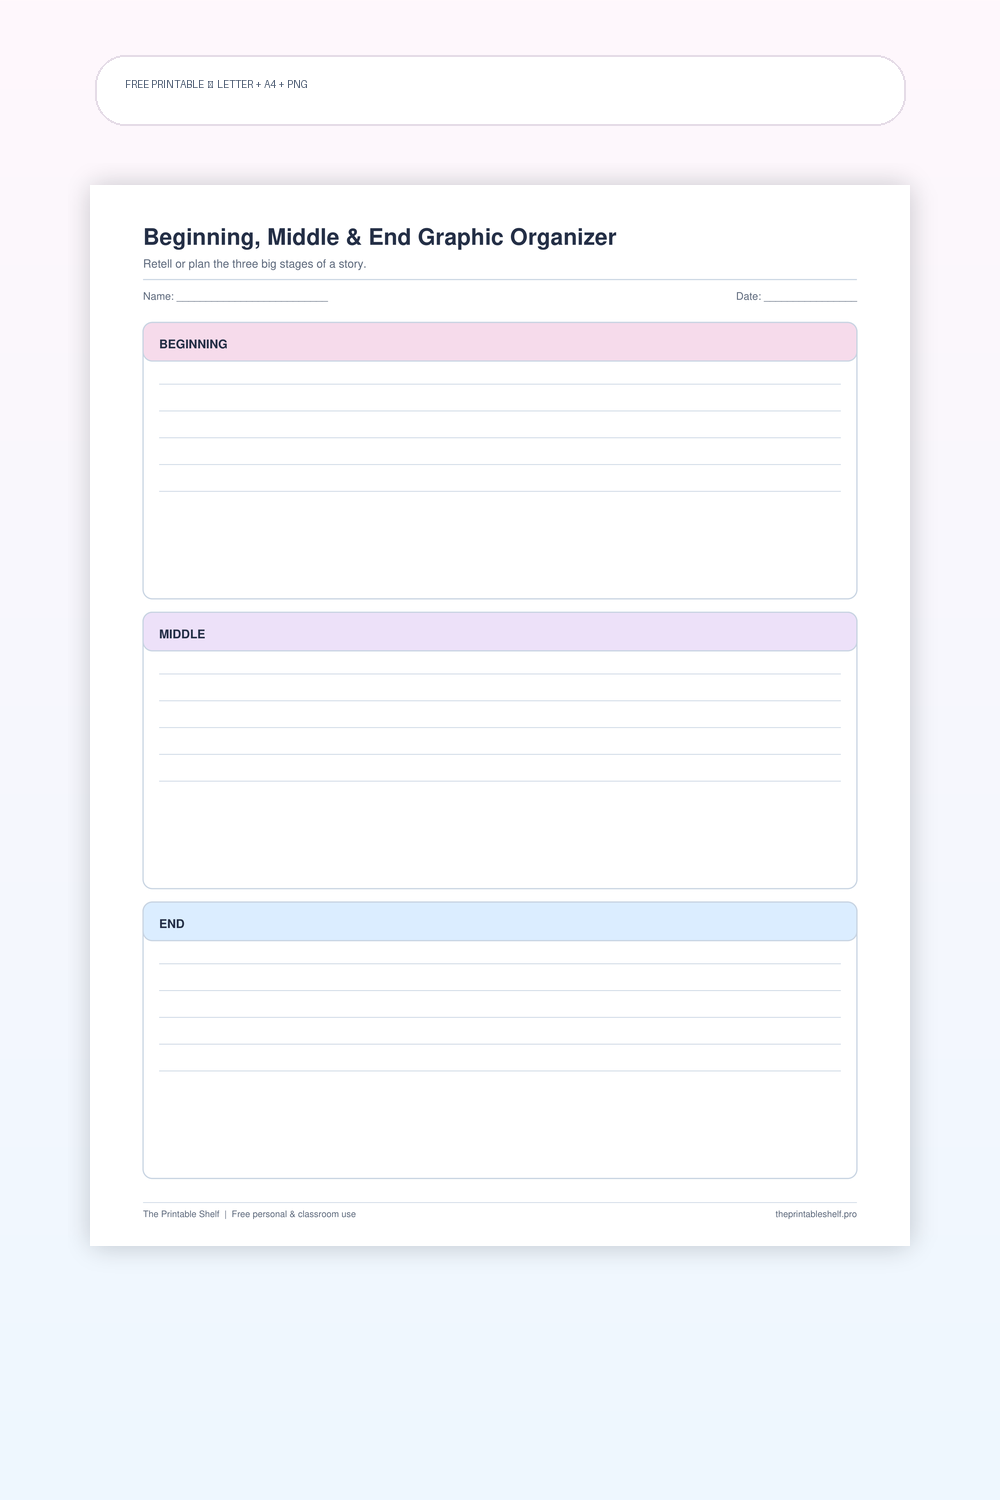
Beginning, Middle, and End Graphic Organizer
A three-part story structure page with enough room to write or sketch the most important events in each stage. It is deliberately simpler than a full story map or five-step sequence organizer, making it especially useful when the goal is basic retelling, summarizing, or planning a short narrative without overwhelming the learner with too many boxes.
Free printable
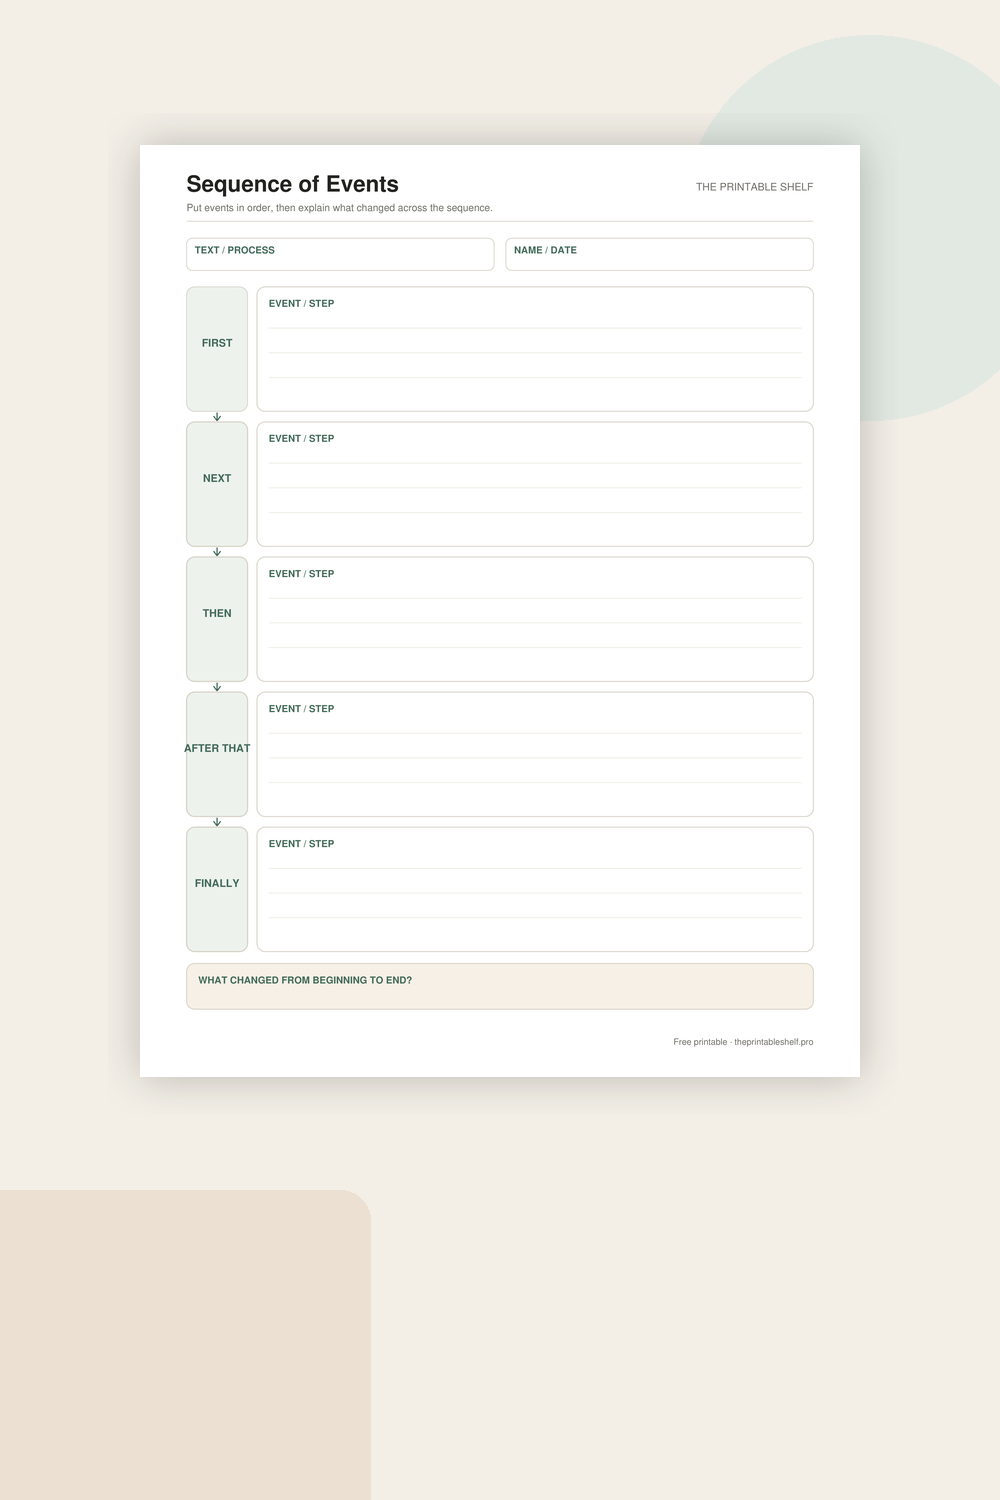
Sequence of Events Graphic Organizer
A vertical sequence chain that makes order visible without squeezing each event into tiny boxes. Five linked writing areas support short event summaries or process steps, and a final reflection box pushes the learner to notice the overall change from beginning to end rather than merely copying chronology.